Teardown: a look inside Apple's Time Capsule backup appliance
 Prince McLean
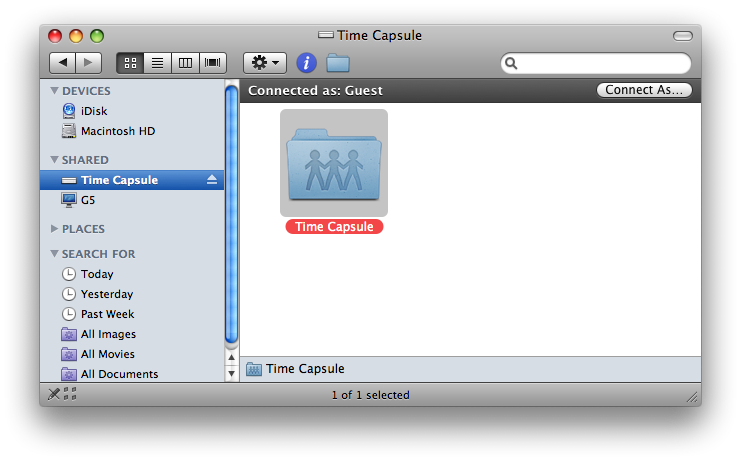
Time Capsule moves Apple's popular AirPort line of wireless base stations one step closer into the realm of embedded servers, providing shared file and print services in addition to acting as a target for Leopard's Time Machine feature. Here's a look at how it works with Leopard, Tiger and Windows clients, and what components are inside the device making everything happen.
Time Capsule is also slightly larger, allowing it to include a full size 3.5" hard drive in either a half of full terabyte (1024 GB) storage capacity, as well as having its 30 watt power adapter included inside the device rather than shipping as an external power brick like the Extreme.
Simple File Sharing in Leopard, Tiger, and Windows
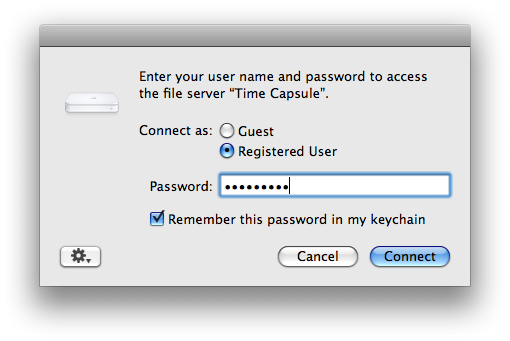
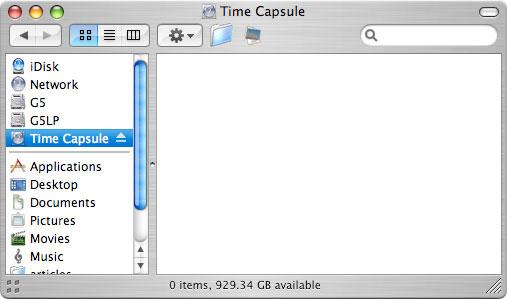
Once configured, as described in Apple Time Capsule unboxing and preview, the unit serves up its internal hard drive as a shared disk. Leopard users will immediately see the shared Time Capsule volume in their Bonjour-discovered list of Shared items in the Finder (below).
Leopard automatically connects as a guest, but users can also use the Connect As button to login as a specific user, and save their password in the keychain for automatic login at next discovery (below)
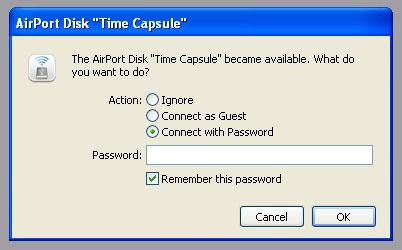
Tiger users will need to use AirPort Disk Utility to login and connect to the shared disks on Time Capsule or an AirPort Extreme (below top), which will then show up in the Tiger Finder as a mounted drive (below bottom).
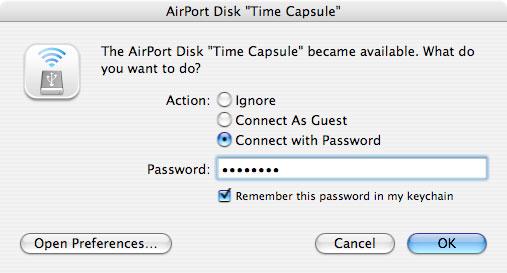
AirPort Disk Utility is also used in Tiger to set the preferred behaviors for automatically logging into and mounting the volumes when they become available on the network (below). These features have been replaced by Leopard's smarter Finder, which both browses for shared drives automatically and presents options to login as a guest or specific user. The utility's options to "Automatically discover AirPort Disks" and "Show AirPort Disks in the menu bar" are therefore now ignored under Leopard.

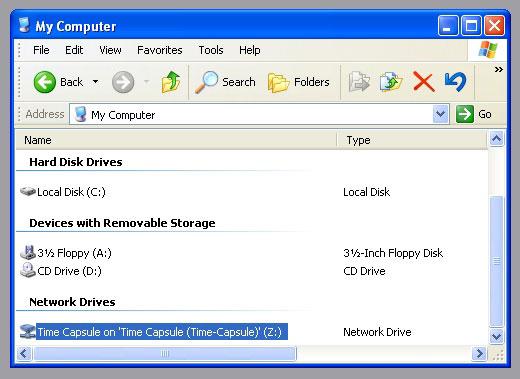
Windows users get the similar AirPort Disk Utility (below top) to discover shared disks being served from a Time Capsule or Extreme, and the shared volumes are mounted in the Windows Explorer (below bottom) as network drives.
The Xserve Nano
Time Capsule, just like the AirPort Extreme, shares the same volume to both Mac and Windows users, making it an easy way to share files cross platform without requiring any file server expertise. There's no directory server to manage and no complex file permissions to set up. Time Capsule presents a single volume as a single share with one set of permissions per user.
There are no fancy options to provide specific users with access to certain folder or files; in order to do that (such as reserving access to accounting files), users would either need to save those files within an encrypted disk image or spring for a more complex server solution, such as using Leopard Server running on a standalone computer.
For home users and small businesses with basic needs, Time Capsule (and the identical Extreme) provides a low cost, low maintenance, and extremely simple solution for providing centralized file sharing. In addition, both units can also be expanded via USB to share a standard printer and additional volumes on other external USB hard drives, using a USB hub if necessary.
Even with multiple disks, there is only one set of security options. That means you can't add a drive just for accounting. As noted previously, File Sharing security is limited to three options:
with a Time Capsule password uses the same password to access the shared disk as to join the wireless network
with a disk password uses a separate password for the network and disk access
with user accounts sets up the ability to add multiple users on a third tab, each with their own password and an option to limit them to read only access or to block their access without affecting the other users.
As with other wireless printer sharing options, plugging a shared printer into the Time Capsule's USB port for shared use, instead of plugging the printer directly into a computer, may limit the features available on the printer, as some printers require direct USB access to perform activities such as cleaning the print heads.
Inside the Unit
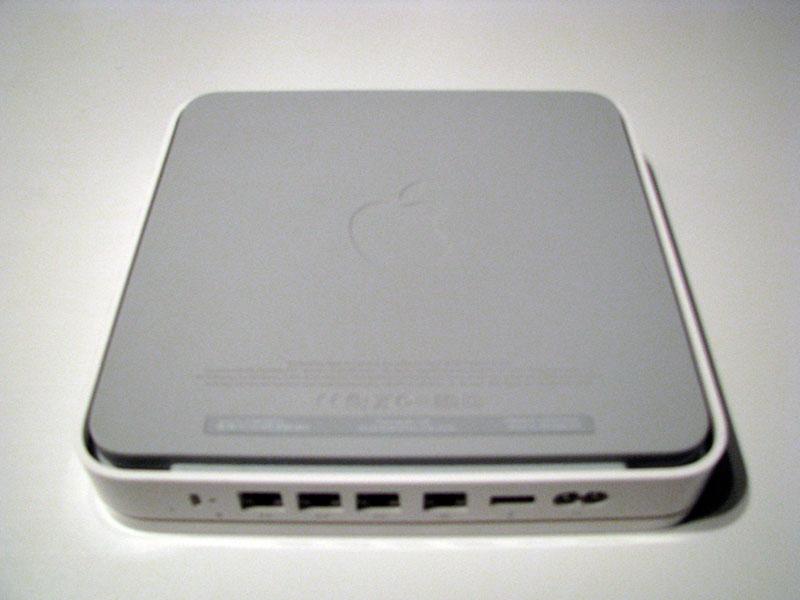
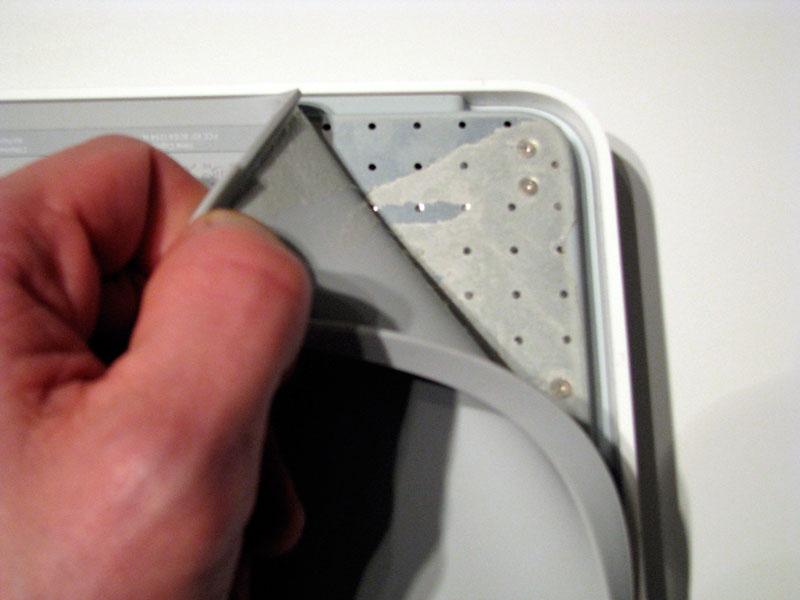
The bottom of the Time Capsule uses the same rubbery non-stick cover as the Extreme and Apple TV. To open the unit, the rubber must be peeled off (below). Enough glue remains on the metal surface to allow the rubber to stick back into place afterward, as long as some care is taken to prevent the sticky surface from being cleaned off or contaminated.

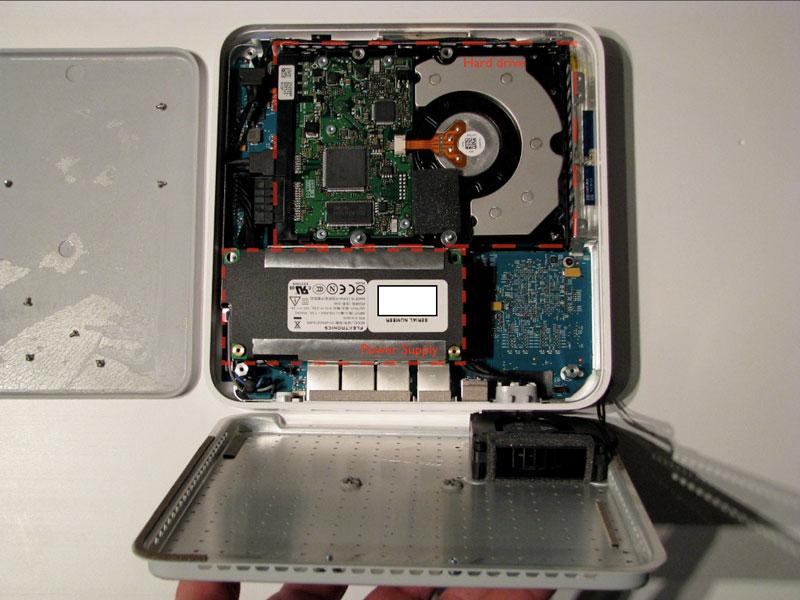
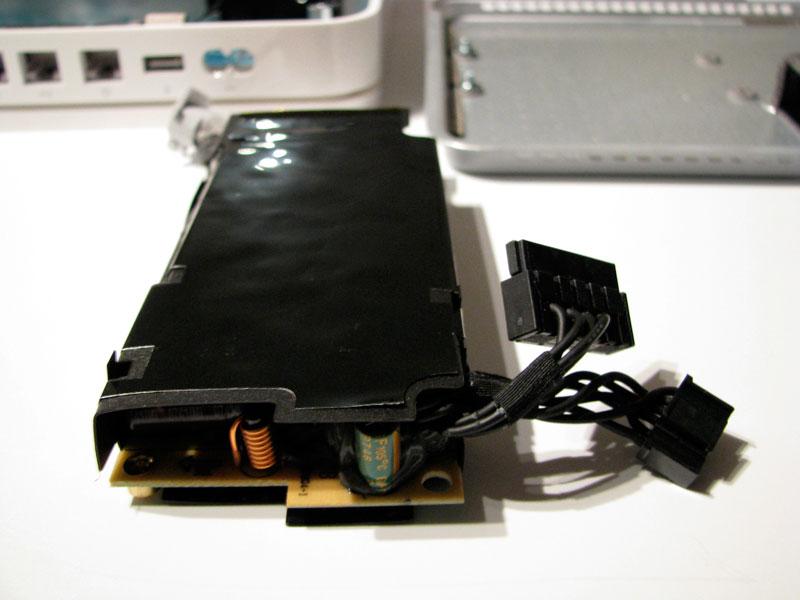
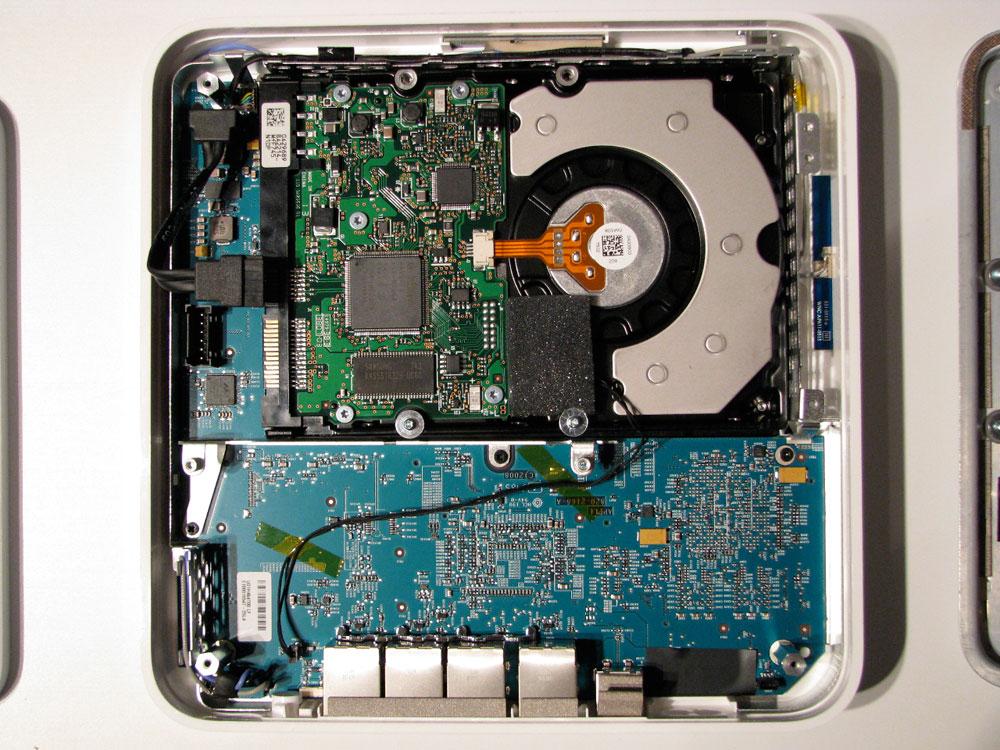
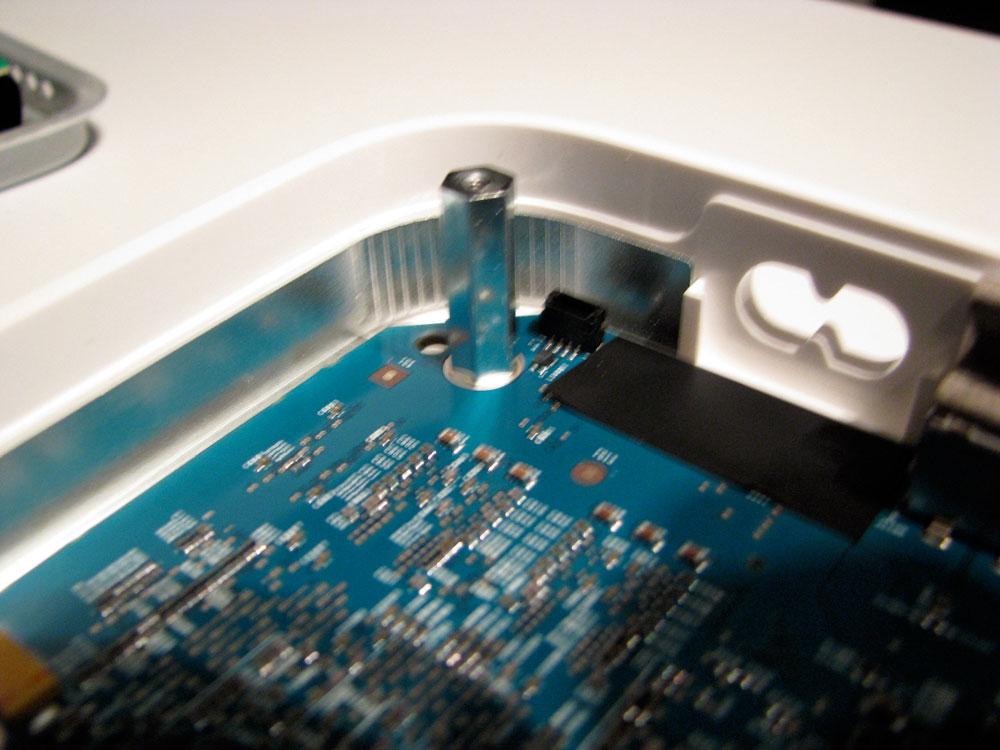
After removing ten standard Phillips #0 screws, the metal plate lifts off. The unit's fan remains attached to the metal cover, and has a power cord that plugs into the logic board (below). Also clearly visible are the hard drive and the 30 watt Flextronics power supply, which directly plugs into both the logic board and the hard drive.
On page 2 of 2: Teardown continued; and Time Capsule uses.
With the power supply removed (below top), the logic board reveals that all the interesting chips are on other side (below bottom).
Removing the logic board requires lifting out the hard drive, removing the bracket that holds the drive in place, and removing three riser posts in each corner (below).
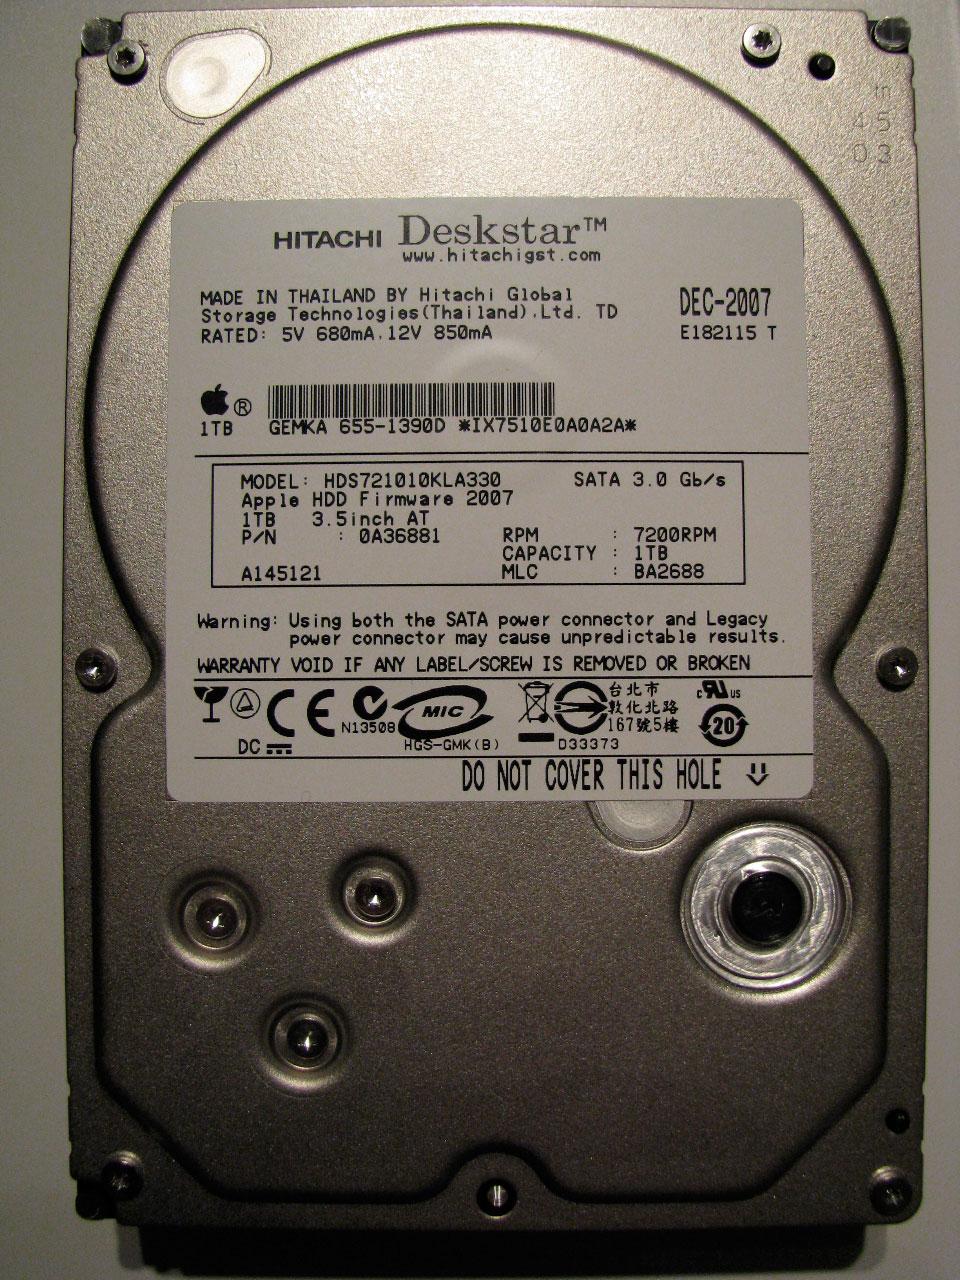
The hard drive is a standard 7200 RPM 3GB/s SATA Hitachi Deskstar (below). This discovery raised some brows because Apple describes the drive as "server rated," which suggested a heavy duty drive rated to 99.999% uptime. While the drive is more typical of units used in desktop computers (and also used in the company's Xserve line), it is certainly a better choice for a file server than the Apple TV's laptop sized 2.5" drive.
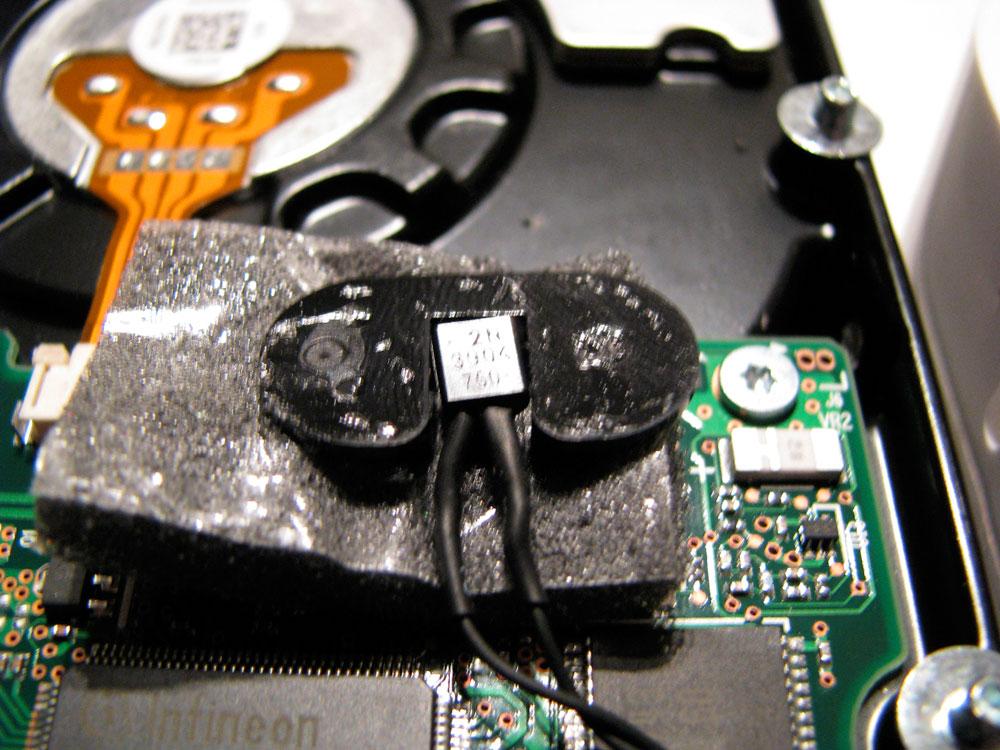
Because the unit uses a standard HFS+ file system, it is possible to remove the drive and repartition it or perform drive file system recovery. It will also easy to replace the drive with a larger version when bigger SATA drives become available. The hard drive has a temperature sensor monitored by the system (below), so this would need to be attached to the new drive. Apart from that, replacing the drive is a simple matter of plugging in power and SATA, just as in a desktop computer.
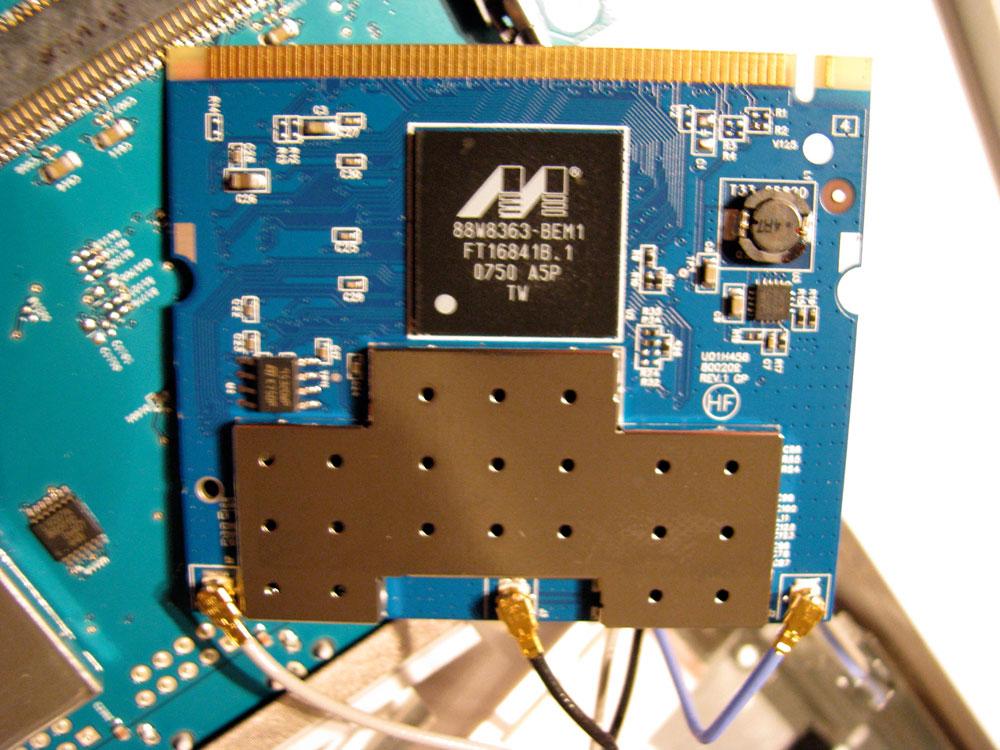
The unit's tiny logic board (below top) holds an 802.11n wireless card, using a Marvell 88W8363 MAC/Baseband chip (below bottom), attached to three MIMO antennas located at three points on the shell.
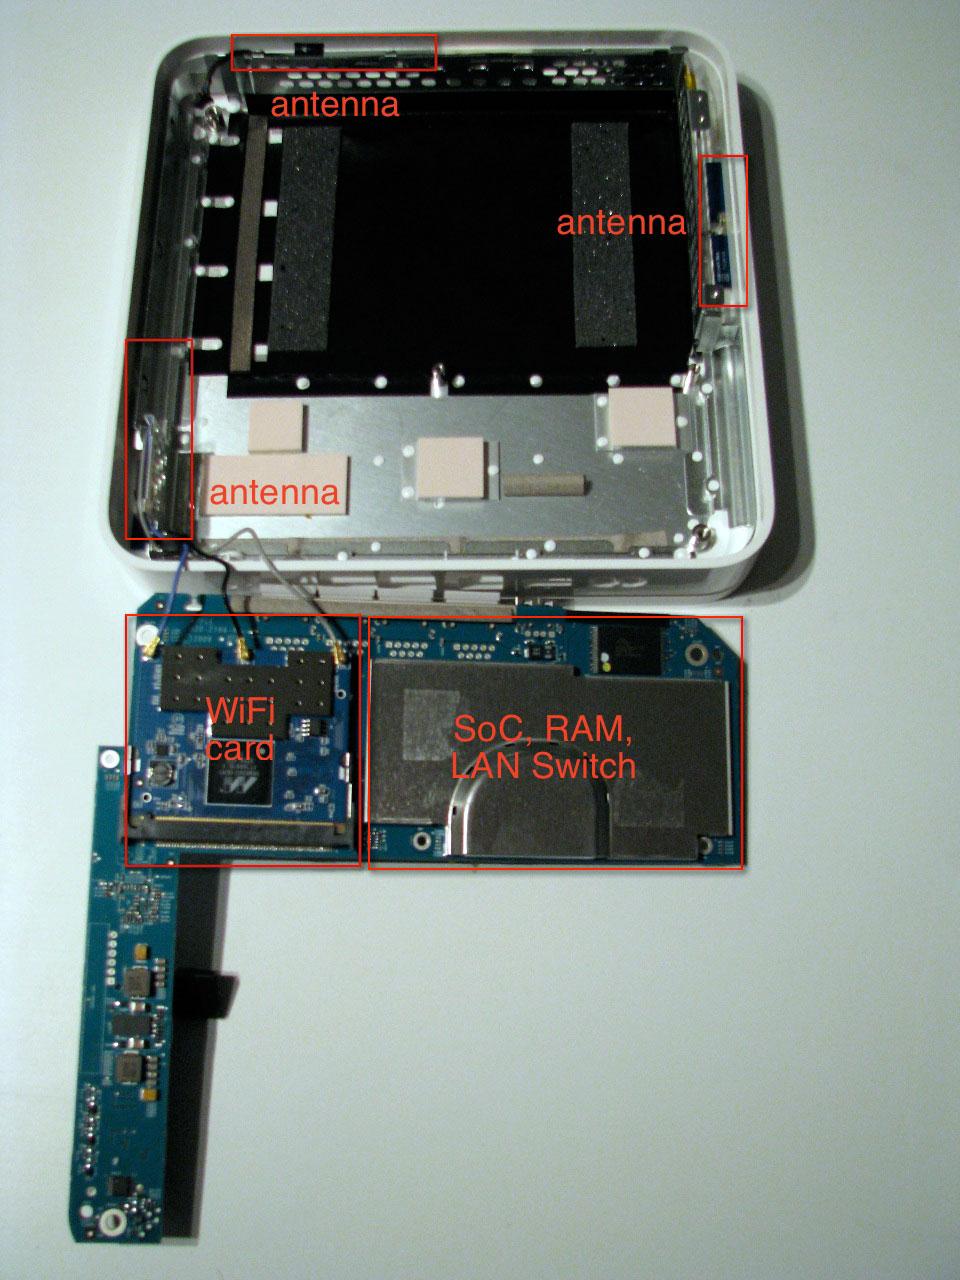
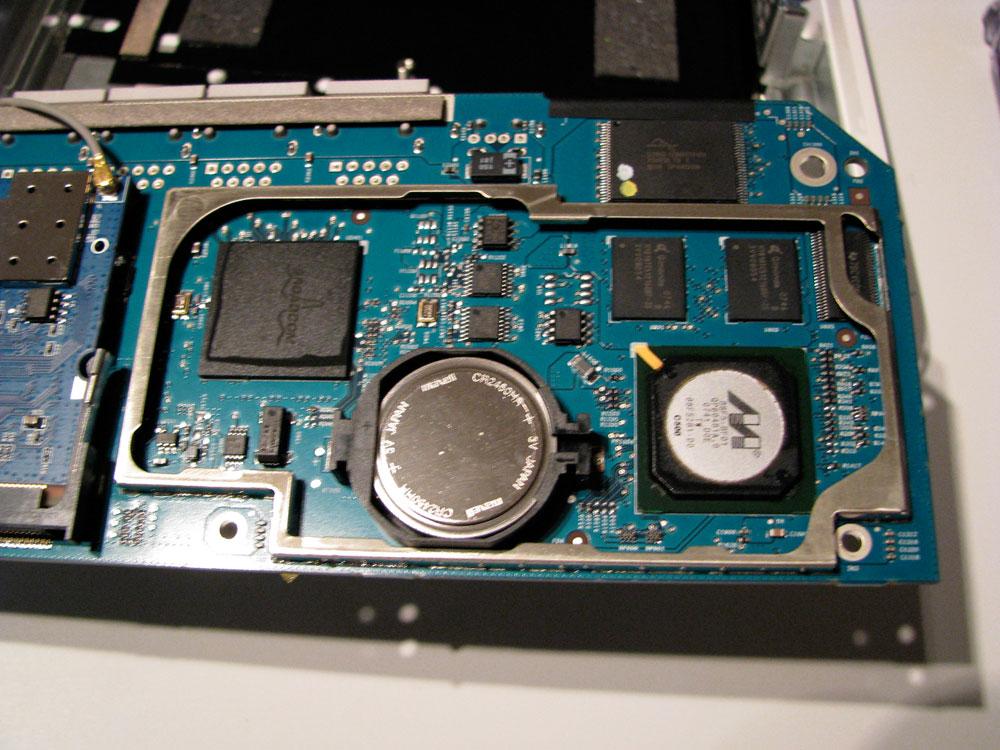
Located under a tin shroud is a lithium battery, the LAN switch, CPU, and RAM chips (below).
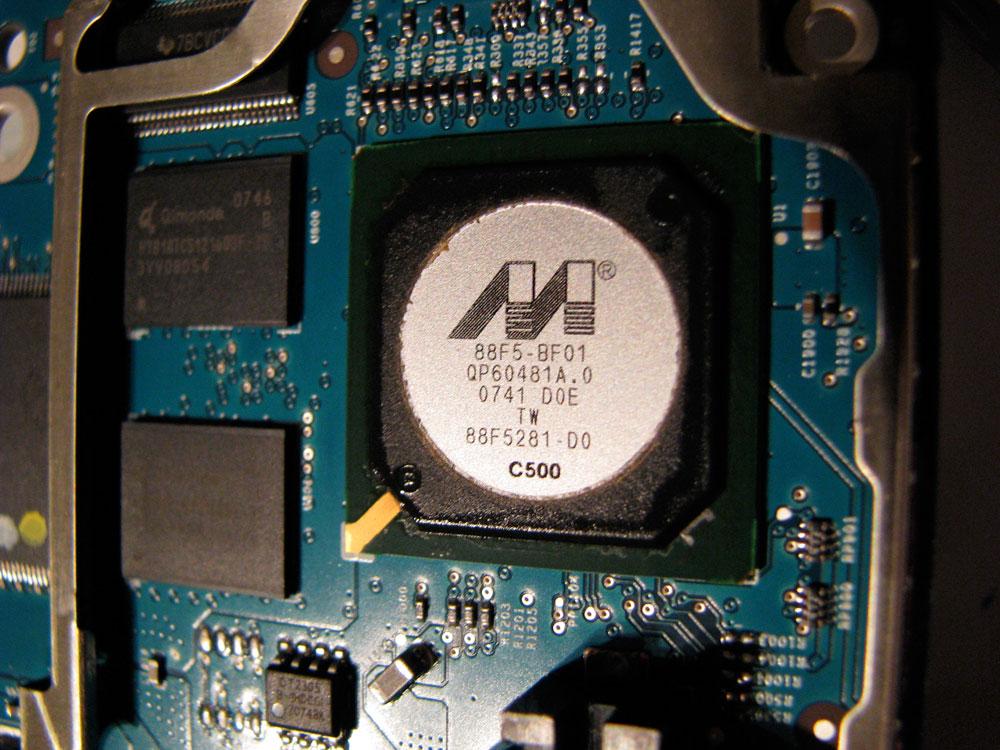
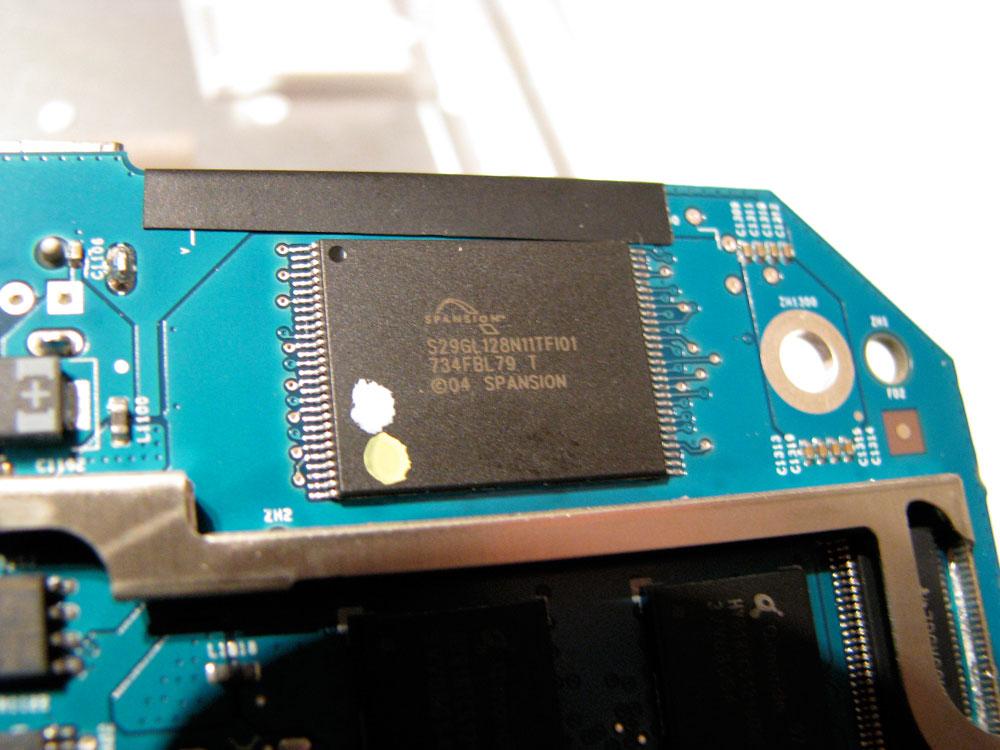
Time Capsule uses:
a Marvell 88F5BF01 C500 500Mhz SoC (System on a Chip) processor (below),
a Spansion S29GL128N11TF101 16 MB (128 Mbit) Flash RAM chip (below),
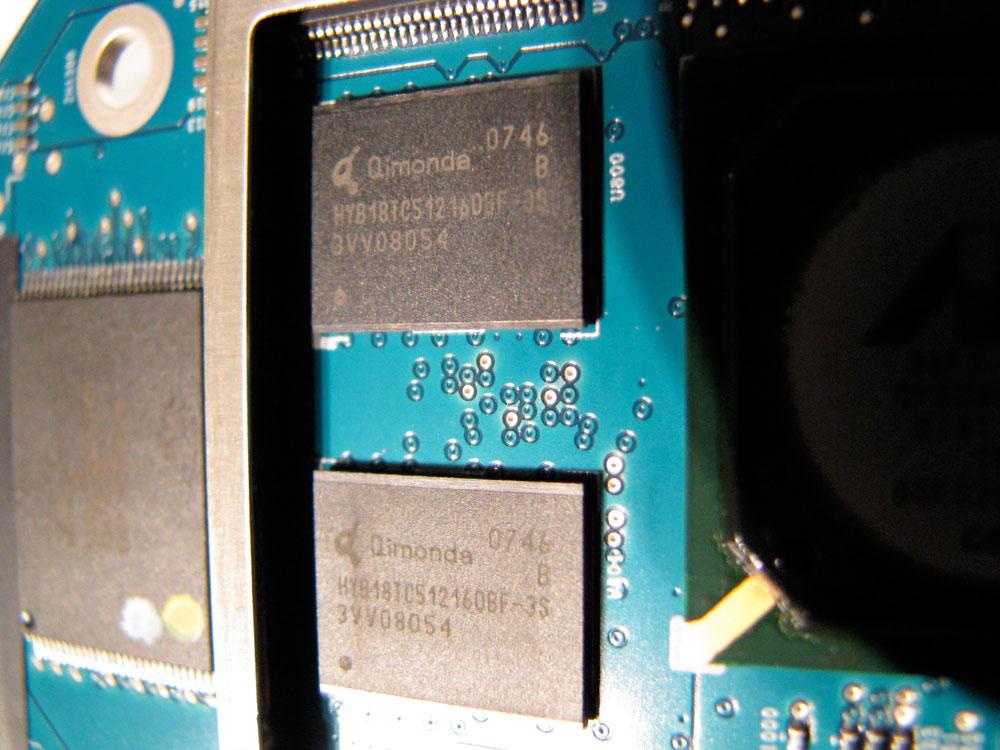
two Qimonda (a RAM supplier spun off from Infineon) HYB18TC512160BF-3S 512 Mbit DDR2 667 DRAM chips providing 128 MB of RAM (below),
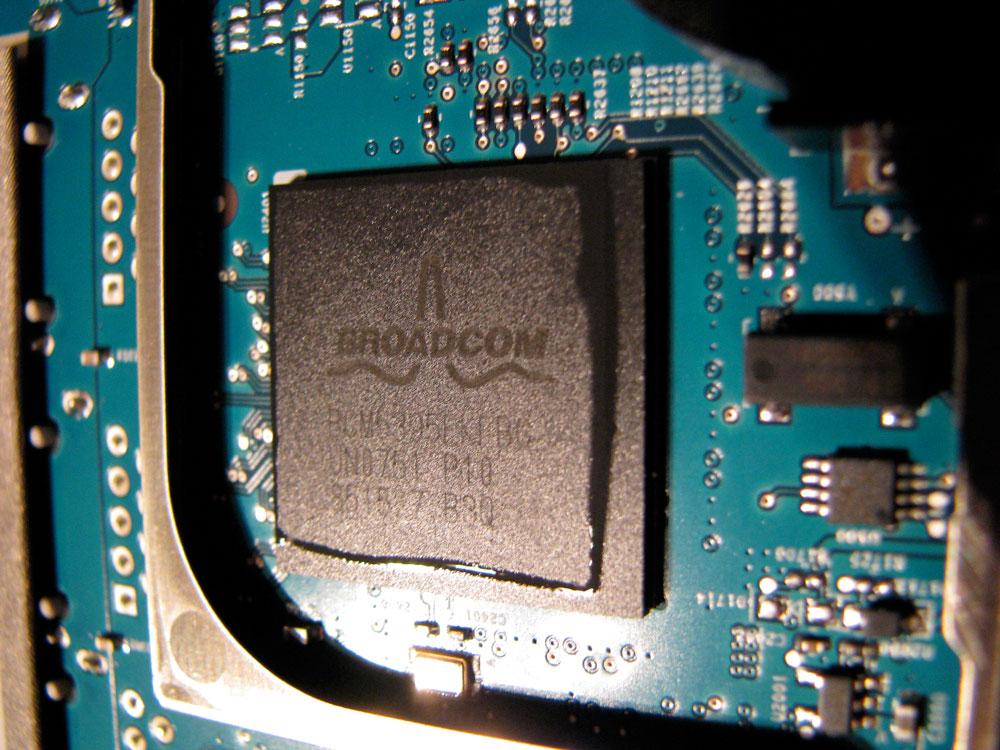
and a Broadcom BCM5395EKFBG Gigabit Ethernet switch controller (below).
AppleInsider's next segment answers questions on how Time Capsule works.


 William Gallagher
 Mike Wuerthele


 Andrew Orr
 Marko Zivkovic
 Malcolm Owen